This time around, we shall cover How To Make A Jewelry Box Small. Obviously, there is a great deal of information on DIY Jewelry Box [Video] on the Internet. The fast rise of social media facilitates our ability to acquire knowledge.
how to make a small jewelry box out of wood-related material is also connected to How To Build A Jewelry Box Out Of Wood and Diy Jewelry Box. As for further searchable items pertaining to Diy Jewelry Box Cardboard, they will likewise have anything to do with DIY Jewelry Box.

80 Fun Facts How To Make A Jewelry Box Small | Diy Jewelry Box
- Truly, when you begin researching which type of wood is best for making a jewelry box, you are going to find just about every wood imaginable. However, to select the right type of wood for your use, you need to consider many perspectives. Fortunately, since you will not require too much wood for this smaller project, your budget might be a bit broadened. Let’s take a closer look. - Source: Internet
- Going on trips is exciting and spectacular, but making sure that all of your belongings are safe and sound might not be. With this travel size option, all of your jewelry can be packed in a way that can keep it from getting damaged, ruined, or all tangled together. All you’ll need is an empty Altoids tin, fabric, scrap fabric, cardboard, a hot glue gun, mod podge, scrapbook paper, a pen, scissors, a ruler, and a sponge brush. - Source: Internet
- Here is a simple and classy jewelry box. You will need a wood box, screwdriver, wood filler, paint, etc. The inner part of this box is covered in velvet to give it a perfect look. Making this looks very luxurious and less expensive. - Source: Internet
- At first, take 2 boxes, make the markings and use a cutter to cut along the markings. After that, take the toothpaste box and cut small pieces from it. Then, color those pieces completely using different colors and keep them aside to dry. - Source: Internet
- A common solution to this problem is a DIY jewelry box, which is unbelievably easy to make. While you can buy one, it’s always more fun to have something that reflects your personal style and tastes. There are so many different materials that can be used to construct one, and the best part is that there are no rules to play by, so you can use just about anything you’d want to. - Source: Internet
- Adding the musical mechanism, also called the movement, to your jewelry box is super easy and such a fun way to customize your DIY projects. Sold for around $8-10 on Amazon, these wind up mechanisms come in a nice variety of 18-note songs. They use a small handle that you screw onto the mechanism to wind it. Any other style will be different than described below to install. - Source: Internet
- Your jewelry box almost looks ready, but before you wrap up. Sand it so that it looks smooth on the edges. Customize your box by applying your seal of choice. And your box will be ready for use. - Source: Internet
- Lift up the “walls” of the box along the two folded edges. Working on one open corner at a time, use your thumbs to press down the tabs. Don’t make any new creases here–just follow the existing folds and the box will start to take shape. (You may have a moment where you think this is never going to work, but trust me, it will.) - Source: Internet
- If you’re like this blogger and have all your jewelry sitting in a big, disorganized pile, the best solution is to make an organizer to keep it all in order. And if that sounds like an option you might like to try, here’s a plan that will show you how to do it. It’s a fun project to attempt, and you’ll end up with a beautiful box to keep all your jewelry in. So what are you waiting for? - Source: Internet
- Paper houses don’t make very sturdy shelters for those living inside, but paper jewelry boxes make excellent storage boxes for keepsake jewelry. Using the right method (ie. the one presented in this video) you can create a very sturdy jewelry box out of paper. - Source: Internet
- This simple jewelry box is inexpensive, very portable, and can be made in big or small sizes. Can be gifted as well and it’s super easy. You will need cardboard in making this and other simple materials including glue, etc. - Source: Internet
- Show the owner of the jewellery box that you thought of everything. Glue small felt squares to the bottom. This prevents slipping and scratching of smooth surfaces. - Source: Internet
- This is another extremely inexpensive plan for a jewelry box since this one is made using nothing more than cardboard, paper and glue. However, that doesn’t mean it ends up looking cheap – far from it. As you can see at the end of the video, the finished job is stylish and artistic, so if you’re looking for an enjoyable craft project to tackle, this could be just what you need. - Source: Internet
- Pecan is another great type of wood used to make a jewelry box. It is less expensive than cherry, but it still has a beautiful wood grain that can add to its design appeal. Truly, it is sometimes an overlooked yet a stunning type of wood to select. - Source: Internet
- Wood has timeless aesthetic value. That’s why a wooden jewellery box is always a stylish gift. You can decorate it, but a simple wood finish is usually the best answer. - Source: Internet
- The storage box is very posh. Perfect for watches and bracelets. The creator made use of a cardboard box, toilet paper tubes, or a cardboard roll to the desired size of your jewelry, cling wrap them, and voila it’s ready. - Source: Internet
- Building a simple jewelry box is affordable. The creator made use of woods, cut out into sizes and desired lengths. If you’re good with woods I’ll recommend this. Easy and fun. - Source: Internet
- The glam box is all beauty and glam. In making this the first step is spraying your box with a finishing spray. The creator made use of mirror titles and also blink wraps. I recommend this for a perfect jewelry box. - Source: Internet
- Knowing how to fold a paper gift box is an important tool to have in your crafty arsenal. Once you know how to do it, you can make one in any size you like using any paper you please. This technique is perfect for impulsive gift giving year round, and it comes in especially handy on Valentine’s Day when you need just the right box for gifting a teeny token of love or a batch of sweet treats. In the occasion that this post got your creative juices flowing, check out some of our other favorite Valentine’s Day crafts on Creativebug. - Source: Internet
- Voila! You’ve done it. Following a step by step guide shows you what you’re capable of. Building wooden jewellery boxes is only the beginning. What other small woodworking projects will you attempt next? - Source: Internet
- As mentioned above, many factors go into choosing the right wood for making a jewelry box. Most often, this is because this special piece is for a loved one, or it will hold heirloom jewelry that can be passed down (or has been passed down) in your family for generations to come. So, you do not want to mess up by getting the wrong type of wood. - Source: Internet
- Now, take a printed paper and get the exact measurement. Take glue and apply it all over the box. The last step is to put the colored boxes in the main box as they will act as compartments or as a divider to segregate the jewelry from one another. - Source: Internet
- Making this is super easy, all fun and less expensive. You will need a sheet of felt, a wooden box, paint, ruler, etc. You choose whatever design suits you. - Source: Internet
- Yet another great way to recycle scraps lying around your house can be through making this fun and fashionable organizer. The only supplies that you will need include glue, a ruler, pencil, marker, scissors, cutter, foam, an empty box of chocolates, printed napkins, and an extra sheet of paper. It’s preferable that the box base be square, and the same goes for the napkins. - Source: Internet
- A very cute and stylish personalized pink jewellery box that makes a beautiful gift for basically any occasion or just because. Jewellery box is personalized with a name to make them extra special. Jewellery Box comes wrapped in a white ribbon. - Source: Internet
- I lucked out by finding a gorgeous layered design in Cricut Design Space meant for a greeting card. It was easily modified the design to specifically fit the lid for this jewelry box. You can access the ready to cut veneer inlay design here. If you need a different size, you can access the original design by searching for #M38495B (Gilded Floral Card). - Source: Internet
- In categorizing this handmade jewelry box I will say it’s unique, inexpensive, exquisite, and not easy to forget. This serves as a perfect gift for Mother’s day, all you need is a fence post cap. The tip in making this is to ensure proper fitting, apply spray paint, add a handle and a piece of soft fabric inside. Viola! - Source: Internet
- Hickory is unique in what it can bring to the table for a jewelry box. Hickory heartwood is darker in color, but the sapwood is a brighter yellowish color. This can add a highly contrasting coloration appeal that sends many people into awe. - Source: Internet
- This DIY Musical Jewelry Box with Veneer Inlay Design is made using this specific unfished wood jewelry box available at Amazon. You can use any music box you’d like but I’d look for one that has a lip around the top of the lid for the design to fit neatly within. You also need a box with removable trays inside so that you can hide away the little metal music mechanism. - Source: Internet
- Why not try something completely unique, unheard of, and unconventional? This cute, tiny box can be accomplished with one of the easiest-to-find materials: a walnut. That’s right, you won’t need to be a construction specialist in order to do this. All you’ll need is a big walnut, a scrap of thin cotton fabric, a satin ribbon, pliers, scissors, brush, wood glue, a knife, and a rotary tool. - Source: Internet
- Now my mom probably doesn’t remember the movie all that well because she was probably doing a puzzle on her tablet. But she was there when we all watched a movie and the boys fell in love with one of the movies I love most in this world. And so I thought it would be pretty darn nifty to make a DIY musical jewelry box for my mother that took a song from “Spirited Away”. As an added bonus, the top also features a gorgeous inlay design I cut with my Cricut Maker. - Source: Internet
- This jewelry box is perfect for those who like decorated paper which creates surface designs with lovely patterns. This marbled jewelry box is a perfect design on its own made using a cigar box. The beauty in this baby is about experimentation. You will need a few materials. Follow the directions in the link below and you will enjoy what you’ve created. - Source: Internet
- Probably the reason why you have landed on this page is that you are looking for the easy and simple ways to make jewelry box at home. Therefore, in today’s post, we have got you covered with some simple ways for making a jewelry box. The jewelry boxes made from these methods can store your Celtic Wedding Rings in a fashionable and safe manner. - Source: Internet
- Here is a simple jewelry box made with a geometric pattern, quite easy. In making this you will need a wooden box, acrylic paints, brushes of your choice, an HB pencil for sketching out your work also a black sharpie, ruler, etc. The link below gives a proper analysis of this creation. - Source: Internet
- Recently I was lucky enough to discover a really awesome project to create a cute little jewelry box using a very surprising supply … a duct tape roll of all things. I am crazy about this project because it makes a little box which is just the right size to present as a gift box. So not only have I made several of these for myself, but I’ve also started making them to use as gift boxes in the future for presents of handcrafted jewelry for family and friends. - Source: Internet
- Tips for Making Handcrafted Wooden Jewelry Boxes For an original design, you can make your own wooden jewelry box. If you are new to woodworking, you can learn simple patterns from craft books and find free box plans online at sites like Jim Barry’s Woodworkers’ Workshop. The Internet has free jewelry box plans for all woodworking skill levels from beginners to skilled craftsman. Here are some tips for making handcrafted wooden jewelry boxes: To save money, pick a less expensive wood, such as oak or poplar, for your beginner projects and practice pieces until you get more skilled. - Source: Internet
- What’s special about this box is that it makes noise when you open it in the light, so the entire purpose is to only use it in the dark- unless you like the noise that’s emitted. You can also adjust the light that is emanating from the storage unit, too. It’s a bit difficult to build, but you’ll be able to get your creative juices flowing. - Source: Internet
- You’ll notice that I did not remove all of the hardware on the jewelry box I painted yellow. These were attached with small nails vs. the screws. - Source: Internet
- Here’s another plan for a cute jewelry box that lots of people will enjoy making themselves. The plan is super-easy to copy, and it only requires a few inexpensive items that you can easily pick up at your local craft store. It looks highly professional too, so if you like the design, why not see if you can make something similar? - Source: Internet
- This walnut jewelry box is creativity at its peak. You could use anything to make a jewelry box, just go creative. Here the creator uses walnut and after cleaning the inner part of it placed a perfect glued fabric inside of it, cutting out the excess. Viola. - Source: Internet
- Chances are good you have an old, perhaps even vintage, wooden jewelry box lying around collecting dust. Giving a jewelry box some DIY love with paint can give it a quick makeover you’ll be proud to display. So, how do you paint a jewelry box? To paint a jewelry box, you must first take off existing hardware. Then use spray paint, chalk paint, or other furniture appropriate paint, getting in all of the nooks and crannies. Spray paint is the fastest method and can provide a nice, even finish. - Source: Internet
- Because building wooden jewelry boxes are simple you can adjust the size to the requirements. Below we use a set of measurements that are appropriate for most people’s uses. But customize them to suit the available space or number of jewellery pieces it must contain. - Source: Internet
- If you or the person whom you intend of gifting this to likes the show Adventure Time, this unique option will surely prove to be a great present. While the original product is meant to simply be a gift box for something that you intend on giving to someone, you can most certainly use it for jewelry, too. The best part of all is that it only took the author 6 hours to make, and only $5 for the papers. - Source: Internet
- Using decorative materials you could make an impressive jewelry box, you could create this in any shape. You will need an old box, canvas fabric, foam, cardboard, glitter paper, etc. The most stunning part of this DIY is that you can make different enclosures as you thrill. - Source: Internet
- This DIY jewelry box is simple and less expensive to create. You will need cardboard shaped into your desired size, glue to help put it in place. This type of jewelry box helps you with different compartments. - Source: Internet
- In this post, you’ll learn how to make an attractive jewelry box in just eight simple steps. It looks totally cute when it’s done, and there’s plenty of scope for adapting the design to give the box your own personal touch. This is another plan we enjoyed a lot – great work! - Source: Internet
- If you’re looking for a simple woodworking project that will keep you occupied for a couple of hours, this could be just the kind of thing you need. This plan teaches you how to make an attractive jewelry box that won’t cost you more than around $9. That way, you can save yourself a bit of money to spend on more jewelry to fill it with! - Source: Internet
- If you love wearing jewelry, then you should have a fancy box to store your most prized possessions. And even though there are plenty of ready-made jewelry boxes out there, nothing beats making your own. With the latter, you get to customize the box as you wish. Add more compartments depending on the size and number of jewelry you intend to store and be as creative as you can. - Source: Internet
- This nifty little box is good for holding all sorts of different knickknacks. The author claims to have only spent $4 on this, too, which means that you won’t have to worry about breaking your budget. It will make the perfect gift for anyone on your wishlist who needs a small pick-me-up. - Source: Internet
- Place the largest, bottommost piece of the inlay design inside of the beveled lid. Since no 2 jewelry boxes will have the exact same shape inside, you might need to trim a little bit with a pair of scissors to get the piece to fit neatly inside the space. First mark the backside of the pieces with a pen and make a small mark on the lid that corresponds and will be hidden by the layered veneer. This will make sure you get the pieces to fit together again correctly. - Source: Internet
- This DIY book jewelry box is simple and quite easy. The creator used an old book to make this beauty. The link below gives more guidelines on how to accomplish this. - Source: Internet
- Here’s a fun plan to begin with. In it, you’ll learn how to transform any box you happen to have lying about into a convenient and stylish place to organize all your jewelry. It’s easy to copy and will hardly cost anything, making it a plan we’re sure lots of people will want to have a go at copying themselves. - Source: Internet
- If your jewelry needs a pretty place to go, these DIY jewelry organizers will keep all your earrings, necklaces, and bracelets in one organized place. There’s a wide variety of organizers from something simple like a handmade jewelry box to something a little more complicated like a wall cabinet. Depending on the size of your collection, some of these jewelry organizers are going to be a better fit than others. - Source: Internet
- Gently screw through the holes in the bottom into the mechanism to hold in place. Do not overtighten screws or you could risk stripping them. Add the handle to wind the music box. - Source: Internet
- As this DIYer tells us, part of the reason she wanted to make her own DIY jewelry box was that she couldn’t find one in a store with all the features she wanted. That seems to make a lot of sense, and if it’s a situation you can relate to, this is a plan that should appeal since it teaches you how to make one to your own specs. Of course, you’ll have to adapt her ideas to meet your needs, but at least her plan should give you a few ideas about how to get started. - Source: Internet
- This wooden box is 10x5 and 3 high and the ratio is 2.1 making it look big enough but not too big. In achieving this magic you will need a little wood. The creator made use of walnut with some nice figures to make the top and bottom. - Source: Internet
- Glue twine in a spiral around the top of the second circle of cardboard, covering it completely. This will be the lid of the jewelry box. - Source: Internet
- This blog post suggests that making a jewelry box like this would be a great idea for a Valentine’s Day gift. It’s rated as an intermediate level project, but as long as you have a few basic DIY skills, it shouldn’t be too hard to copy. You can expect it to cost around $20-50 to make, but it will be worth far more than that just to see their reaction when they unwrap it on the special day! - Source: Internet
- Tip: If this box is meant as a present you need to plan ahead. Any stain or finish will give off some residue at first. Allow for enough time that the box can stand and dry completely before gifting it. You don’t want your friend’s hands stained, right? - Source: Internet
- Creating several compartments and drawers is most suitable for those who have quite a vast jewelry collection and need somewhere to put everything. Make sure that you measure the dimensions carefully so that all the drawers and trays will fit correctly. This is a bit time-consuming, but the end result will be completely worth it. - Source: Internet
- Wooden Jewelry Box Designs Wooden jewelry boxes come in a number of designs that can appeal to people of all ages and tastes. There are whimsical styles aimed at children, feminine designs for women and tailored ones for men. The boxes come in all sizes ranging from small ring-sized containers and classic single-compartment rectangle boxes to large chests with multiple partitions for all types of jewelry. Examples of wood jewelry box designs includes the following: Musical single-compartment rectangular wood box with twirling ballerina figure inside - Source: Internet
- Having done that, you should kick off your project by breaking down the wood. Do so according to the size you wish your box to have. Ideally, 1/2” and 3/4” stock will be sufficient. - Source: Internet
- Making a small jewelry box can be effective and it helps maintain your favorite collections. This box is made out of cardboard and glue. In making this exact type you need to use the measurement provided in the above link. You will need fabric or wallpaper, cardboard, cutting board, etc. - Source: Internet
- Definitely a more complicated option, but beautiful and unique nonetheless. It’s important to make sure that you follow the instructions carefully while also taking care to use a felt bottom, which will prevent the box from scratching up your table. It involves quite a bit of work, but nothing a good day of woodworking can’t do. - Source: Internet
- This is a creative idea for an inexpensive jewelry box that’s based on a cookie tin. We loved seeing the box take shape, and the peaceful, relaxing music makes the video a pleasure to watch. The box is a convenient item to own too, so why not see if you can make something similar? - Source: Internet
- This is a quick and super brilliant storage idea mostly for rings. You will need an empty chocolate box insert, ruler, glue, pencil felt. Basically in making this, you need to measure and match your felt piece to the chocolate. On each square of felt, you make two dots and draw a short line, cut and apply glue Voila your storage box is created. - Source: Internet
- There’s no need to spend lots of money buying an expensive jewelry box when you can make a stylish version of your own from cardboard. We have to say it looks amazing when it’s done – this YouTuber is clearly very talented. And if you want to own a box just like it, all you have to do is follow her plan to make one for yourself. - Source: Internet
- Once your top and bottom are done, fill the box with your cute handmade gift and nestle the lid on top. And if you use a pretty paper to make the box, no gift wrap is required! When first learning this technique, I recommend practicing on printer paper before diving into the fancy stuff. Once you get the technique down, this is a super fun and easy way to make a box in a pinch. Happy gifting! - Source: Internet
- In making a mod podge wooden jewelry box you will need a scrapbook, matching fabrics, wooden box, matching paints, etc. After cleaning up your box, you apply your paint inside of the box and you apply mod podge all over your scrapbook. The final Magic is adding your fabric. - Source: Internet
- All classy and fancy. Making a wooden jewelry box with drawers needs patience and you have to be good with woodworking. After proper analysis and a perfect cut of the wood. Applying glue on the edge and sides to keep it all together. - Source: Internet
- Turn the bottom of the box over and place it paint dot side down onto the surface. Tape into place. Using a drill bit as close to the width of the screws that came with the mechanism, drill THREE holes around the outer edge. - Source: Internet
- You have come into a right place if you want to DIY jewelry box in cheap price. You will see how wonderful unique jewelry boxes are made out of waste cardboard box. It is not inferior to those jewelry boxes sold in stores. - Source: Internet
- Cardboards are simple to find and can be used for a variety of stuff. In making this jewelry box, Firstly you need to cut out the excessive part in your cardboard box, measure the desired part with your wrapping paper, and glue it properly. Design your inner part and your box is ready. - Source: Internet
- While still upside down, apply a strong adhesive to the open end of small wooden candle cups. Place them adhesive side down on the four corners of the box to act as feet and give some room for the handle to turn as the music plays. Remove the cups and give the glue a few seconds to become tacky. Replace the feet and allow the glue time to dry, several hours is good but overnight is best. - Source: Internet
- Here’s an original design for a jewelry box that’s essentially made of newspaper. However, it looks way better than it probably sounds, and it’s also extremely easy to customize it to match your own style. It’s a great idea that will hardly cost anything to copy, so why not check it out and see what you think? - Source: Internet
- Traditional jewelry box is mostly used by brides to store their ornament. The creator made use of acrylic colors, decoupage glue, craft paper, MDF box. Firstly, color your box, cut your papers to your measurement, apply the decoupage glue and paste your papers. - Source: Internet
- Cut dividers to size out of plywood and cover them with felt. They can be the length or width of the box. Now they can slide into place and even be moved depending on the owner’s requirements. - Source: Internet
- To select the right kind of wood for making a jewelry box, remember that you are using a smaller amount of wood, so you might be able to select a more typically expensive choice. However, if you are new to woodworking, consider a cheaper option. Then, choose a type that can stain beautifully or has a natural color that you like, and one that is easy to work with. - Source: Internet
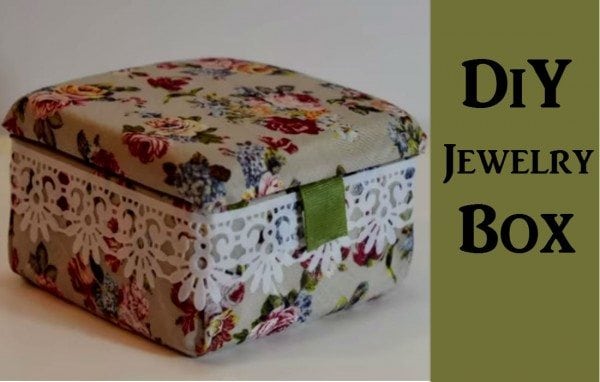
- We take linen fabric to wrap the cardboard box. Crochet lace trims and wooden button are perfect for unique jewelry boxes. An endurable and great-looking DIY jewelry box appears. It will work well for keeping your precious jewelry. - Source: Internet
- Your entire collection of bracelets, rings, necklaces, earrings, and other pieces of jewelry will now be able to fit into one simple yet convenient box. It is meant to be small enough to fit anywhere on your vanity or in a drawer, but you also will be able to store everything you have without difficulty. The best part of this option is that you won’t need to use any power tools. You’ll just need wood, hinges, hasps, wire mesh, a screwdriver, drill, ruler, wire cutters, saw, chisel, sandpaper, and wood glue. - Source: Internet
 Here are some recommendations for locating information about how to make a small wood jewelry box to get you started:
- Research Personalized Rectangle Pink Jewelry Box - Small-related information from credible sources. This includes libraries, websites, and even journalistic professionals.
- When researching DIY Jewelry Box [Video], it is vital to be aware of the numerous sorts of electronic media sources, such as Google and YouTube. Social media networks, such as Facebook and Twitter, are also likely to include information on Diy Jewelry Box Kit.
Here are some recommendations for locating information about how to make a small wood jewelry box to get you started:
- Research Personalized Rectangle Pink Jewelry Box - Small-related information from credible sources. This includes libraries, websites, and even journalistic professionals.
- When researching DIY Jewelry Box [Video], it is vital to be aware of the numerous sorts of electronic media sources, such as Google and YouTube. Social media networks, such as Facebook and Twitter, are also likely to include information on Diy Jewelry Box Kit.Video | How To Make A Jewelry Box Small
To obtain the most accurate information on Diy Jewelry Box, it is essential to investigate the credibility of each source by reading.
This page contains multiple Diy Jewelry Box Kit-related films from a variety of sources, which can expand your understanding about DIY Jewelry Box [Video]. Internet is an excellent resource for getting information on a range of subjects.
## Here are some crucial aspects concerning Paper Jewellery Box:- How To Make A Jewelry Box Small
- How To Make A Small Jewelry Box Out Of Paper
- How To Make A Small Jewelry Box Out Of Wood
- How To Make A Small Jewelry Box Out Of Cardboard
- How To Make A Small Wood Jewelry Box

With so many websites and forums giving Cool case: the DIY wooden jewellery box-related information, it is not difficult to locate what you want.
This is a highly unconventional method for obtaining knowledge on How To Make Jewellery Box With Shoe Box, compared to what most people are accustomed to. It permits a more in-depth examination of the content and application of information regarding How To Make A Jewellery Box With Paper.
 Methods for creating aesthetically pleasing and informative presentations of How To Make A Jewelry Box Out Of Cardboard information. They can be utilized in business and marketing environments to convey messages regarding How To Make A Simple Wooden Jewelry Box. Consequently, we additionally supply photographs regarding Diy Jewelry Box Kit.
This article concludes by providing an overview of How To Build A Jewelry Box Out Of Wood. In addition, Personalized Rectangle Pink Jewelry Box - Small and DIY Jewelry Box Makeover: 8 Simple Steps are discussed to compare your understanding of How To Make A Simple Jewelry Box.
